Posted by Editorial Team on Nov 22nd 2026
Soft Bait Fishing Molds: How to Pour Custom Plastics
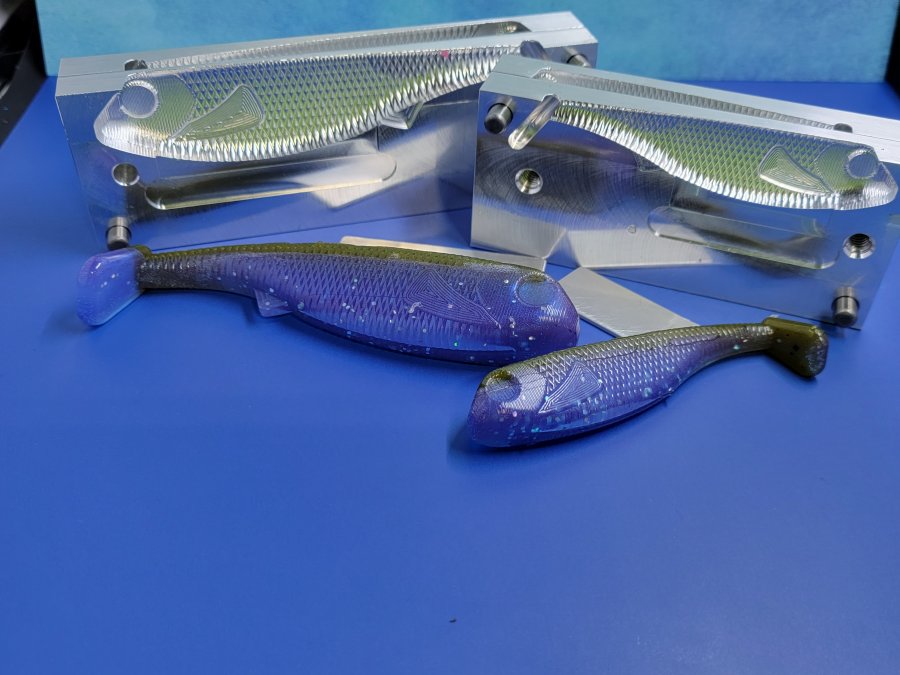
Table of Contents
- Types of Soft Bait Fishing Molds
- Soft Plastic Lure Making Supplies You Actually Need
- How to Pour Soft Plastic Baits Step by Step
- Soft Plastic Plastisol Heating Safety and Ventilation
- Troubleshooting Common Molding Defects
- Advanced Color Layering and Lamination Techniques
- DIY vs. Professional Molds: Cost and Customization Trade-Offs
- Frequently Asked Questions
Last Updated: September 23, 2026
Types of Soft Bait Fishing Molds
Soft bait fishing molds fall into two broad categories: open-pour and injection-style, each available in single or multi-cavity designs. Choosing the right one comes down to how many baits you plan to make and how much control you want over the finished profile.
This guide covers the full process, from choosing a mold to troubleshooting defects, so you can pour baits that actually perform on the water.
Single-Cavity vs. Multi-Cavity Molds
Single-cavity molds produce one bait per pour. They're ideal for prototyping new designs, testing laminate color combinations, or making small batches of a bait you can't buy off the shelf.
Multi-cavity molds pour several baits at once, usually four to twelve. The trade-off is simple: more cavities mean faster production, but a single short shot ruins the whole batch. Start with a multi-cavity mold once your design is dialed in, not before.
Aluminum vs. Composite and Silicone Molds
Aluminum molds are CNC machined from solid blocks, which gives them sharp detail, fast heat transfer, and a working life measured in thousands of pours. They cost more upfront but hold up to repeated heating and clamping without warping.
Composite and silicone molds cost less and are easier to source for one-off designs. The catch is durability. Silicone tears at the injection port over time, and composite molds can lose detail as the surface degrades. For anyone pouring regularly, aluminum pays for itself.
Mold Type | Durability | Detail Quality | Best For |
|---|---|---|---|
CNC machined aluminum | Thousands of pours | Excellent | Regular production |
Composite resin | Hundreds of pours | Good | Prototyping |
Silicone | Dozens to hundreds | Fair | One-off custom designs |
Soft Plastic Lure Making Supplies You Actually Need
A starter setup for soft plastic lure making supplies covers four things: plastisol, a heat source, molds, and safety gear. Everything else is optional until you know what you're doing. What separates a setup that produces clean, repeatable baits from one that fights you on every pour is matching each item to the temperature and chemistry of plastisol, a PVC-based liquid that behaves very differently from wax or soap bases.
Here's the practical list, with the specs that actually matter:
- Plastisol in your base color. Standard plastisol is formulated to gel and cure between roughly 350°F and 375°F. Keep a separate bottle of hardener if you want tougher baits for toothy fish, and a softener if you want more tail action on finesse profiles.
- Molds in the profiles you fish most. Aluminum for production, composite or silicone for one-off prototypes (see the mold comparison above).
- A dedicated heat source. A microwave reserved for lure making, or a hot plate with a controllable dial. Never share either with food, plastisol residue and fumes are not food-safe.
- A digital thermometer rated to at least 400°F. Candy and frying thermometers top out too low; look for an instant-read or probe thermometer with a high upper range so you can watch the plastisol climb toward its gel point instead of guessing.
- Heat-resistant gloves and eye protection. Nitrile gloves alone won't protect against a 350°F splash, use heat-resistant gloves rated for high-temperature handling, plus sealed safety glasses.
- A pouring pitcher or injection syringe. Pitchers work for open-pour molds; syringes give you the pressure control that multi-cavity injection molds need.
- Colorants, glitter, and scent. Use colorants formulated for plastisol. Craft-store dyes and water-based pigments can separate, scorch, or fail to cure.
- Mold release. A light spray or wipe for stubborn profiles and any mold that's starting to grab.
- A respirator rated for organic vapors if you're pouring anywhere without strong cross-ventilation (covered in the safety section below).
Skip the impulse buys. A common mistake is loading up on colorants before learning to get a clean fill. Master the pour first, then expand. The anglers who progress fastest buy one good aluminum mold, one reliable thermometer, and a dedicated microwave, then add color and scent once their fills are consistent.
How to Pour Soft Plastic Baits Step by Step
Learning how to pour soft plastic baits takes about an hour to get your first usable batch. The process is straightforward once you understand heat control and timing.
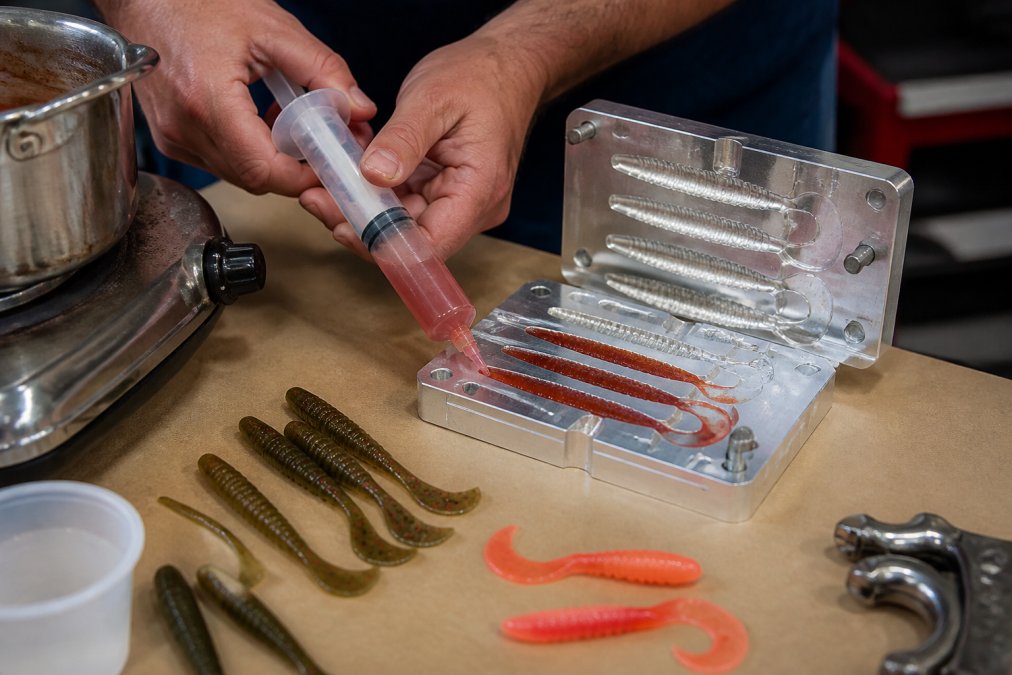
- Preheat your mold to around 350°F so the plastisol doesn't cool before it fills the cavity.
- Heat the plastisol slowly in a microwave-safe pitcher, stirring every 30 seconds until it reaches 350°F.
- Add colorant and glitter and stir until evenly mixed.
- Degas the plastisol by stirring slowly to release trapped air.
- Pour or inject into the mold in one steady motion.
- Let it cool for 2-3 minutes before demolding.
- Trim the sprue and inspect for defects.
Hand Injection Techniques for Clean Fills
Hand injection gives you more control than open pouring, especially with multi-cavity molds. Hold the syringe tip against the injection port and push steadily. Rushing introduces air, which shows up as bubbles or incomplete tails.
Soft Plastic Plastisol Heating Safety and Ventilation
Plastisol fumes are the part most guides gloss over, and it's the gap where a real master guide earns its keep. Heating plastisol past its recommended temperature releases hydrogen chloride and other decomposition vapors you don't want to breathe, and overheating can scorch the material into a dark, unusable batch. The fix isn't a single tip, it's a protocol.
Ventilation: What Actually Works
"Open a window" is not a ventilation plan. For a home setup, the goal is moving air across your work surface and out of the room, not just stirring it around. A box fan in a garage doorway pulling air away from you is the minimum. If you're pouring indoors, a window fan set to exhaust (blowing out, not in) positioned so fumes travel away from your face is far better than a ceiling fan, which just recirculates vapor.
Respirator Selection
If you can't achieve strong cross-ventilation, wear a half-face respirator with organic vapor cartridges, the same cartridge class used for solvent and paint vapors. Dust masks and N95s do nothing for chemical vapor. Replace cartridges per the manufacturer's schedule, and store the respirator in a sealed bag between sessions so the cartridges don't load up on ambient fumes.
Temperature Discipline
Stay at or below the manufacturer's stated maximum, and treat 400°F as a hard ceiling. Above that, plastisol decomposes quickly, the fumes sharpen, and the plastic discolors. Use your thermometer every batch, don't trust the microwave dial or your eyes. If you smell a sharp, acrid chemical odor, you've already overheated it: kill the heat, ventilate, and let the room clear before continuing.
Handling, Storage, and Disposal
- Keep plastisol containers sealed and stored away from heat and direct sun.
- Never eat, drink, or smoke in your pouring area, and wash hands after handling colorants and plastisol.
- Keep a fire extinguisher rated for the material nearby, and never leave heating plastisol unattended, it can go from gel to scorch in under a minute.
- Let cured scraps and trimmed sprues cool completely before disposal. Don't pour hot plastisol down a drain.
Set up a dedicated pouring station with exhaust airflow, a thermometer, a respirator, and a fire extinguisher within arm's reach. Treating safety gear as part of the setup, not an afterthought, is what keeps a hobby from becoming a hazard.
Troubleshooting Common Molding Defects
Most molding defects trace back to temperature, clamping, or air. Here's how to diagnose the usual suspects:
Defect | Likely Cause | Fix |
|---|---|---|
Short shot | Plastisol too cool | Reheat to 350°F |
Flashing | Too much clamping force | Reduce pressure |
Bubbles | Air trapped in plastisol | Stir slower, degas |
Incomplete tails | Mold not preheated | Warm mold first |
Sticking | No mold release | Apply release agent |
Advanced Color Layering and Lamination Techniques
Lamination lets you build two-tone and three-tone baits that mimic natural forage. The trick is pouring the first color, letting it partially set, then pouring the second color on top.
For a clean laminate line, pour your first color and wait 20-30 seconds. The plastisol should be tacky but not liquid. That's your window for the second pour.
DIY vs. Professional Molds: Cost and Customization Trade-Offs
DIY molds made from silicone or resin cost less upfront and let you prototype shapes you can't find anywhere else. The downside is durability and detail. They wear out faster and can't match the crisp edges of a CNC machined aluminum mold.
Frequently Asked Questions
Are aluminum molds better than composite molds for soft baits?
Aluminum molds handle repeated heating and cooling without warping, and they pull heat away from the plastisol faster for cleaner detail. Composite molds cost less upfront but can degrade with heavy use, especially if you pour often. For anglers making baits regularly, aluminum soft bait molds hold up longer and give more consistent results pour after pour.
How do you prevent air bubbles in soft plastic lure molds?
Heat plastisol slowly and stir gently instead of whipping it, which traps air. Degassing, or letting the hot plastisol sit briefly before injecting, gives bubbles time to rise. Inject from the bottom of the cavity and let plastic push upward, and pre-warm the mold so the plastisol stays fluid. A steady hand injection with light clamping force also reduces voids and short shots.
What equipment is needed to start making soft plastic lures?
A basic setup includes a soft bait fishing mold, plastisol, a melting pot or microwave-safe pouring cup, a thermometer, injection syringes, mold release, and safety gear like gloves and a respirator. Soft plastic lure making supplies like colorants and glitter are optional at first. Starter kits bundle the essentials so beginners can learn how to pour soft plastic baits without buying every item separately.
Can you make custom soft bait molds at home?
Yes, but the practical route for most anglers is buying a CNC machined aluminum mold in the profile and size they want, then customizing color, flake, and salt content. Pouring your own silicone or resin molds at home is possible, though it takes more trial and error to get clean cavities. Custom tackle makers often start with a proven mold and refine their plastisol recipe from there.